> ## Documentation Index
> Fetch the complete documentation index at: https://docs.cassidyai.com/llms.txt
> Use this file to discover all available pages before exploring further.
# Deploy via embed
> Embed your Agent on any website or app so external users can chat with it directly.
Embed your [Agent](/agents/overview) on any website so visitors or team members can chat with it without leaving the page. Choose between a static iframe that's always visible or a floating modal that opens on click.
## Set up the deployment
Go to **Agents** and select the Agent you want to embed. Click **Edit** to open the Agent settings.
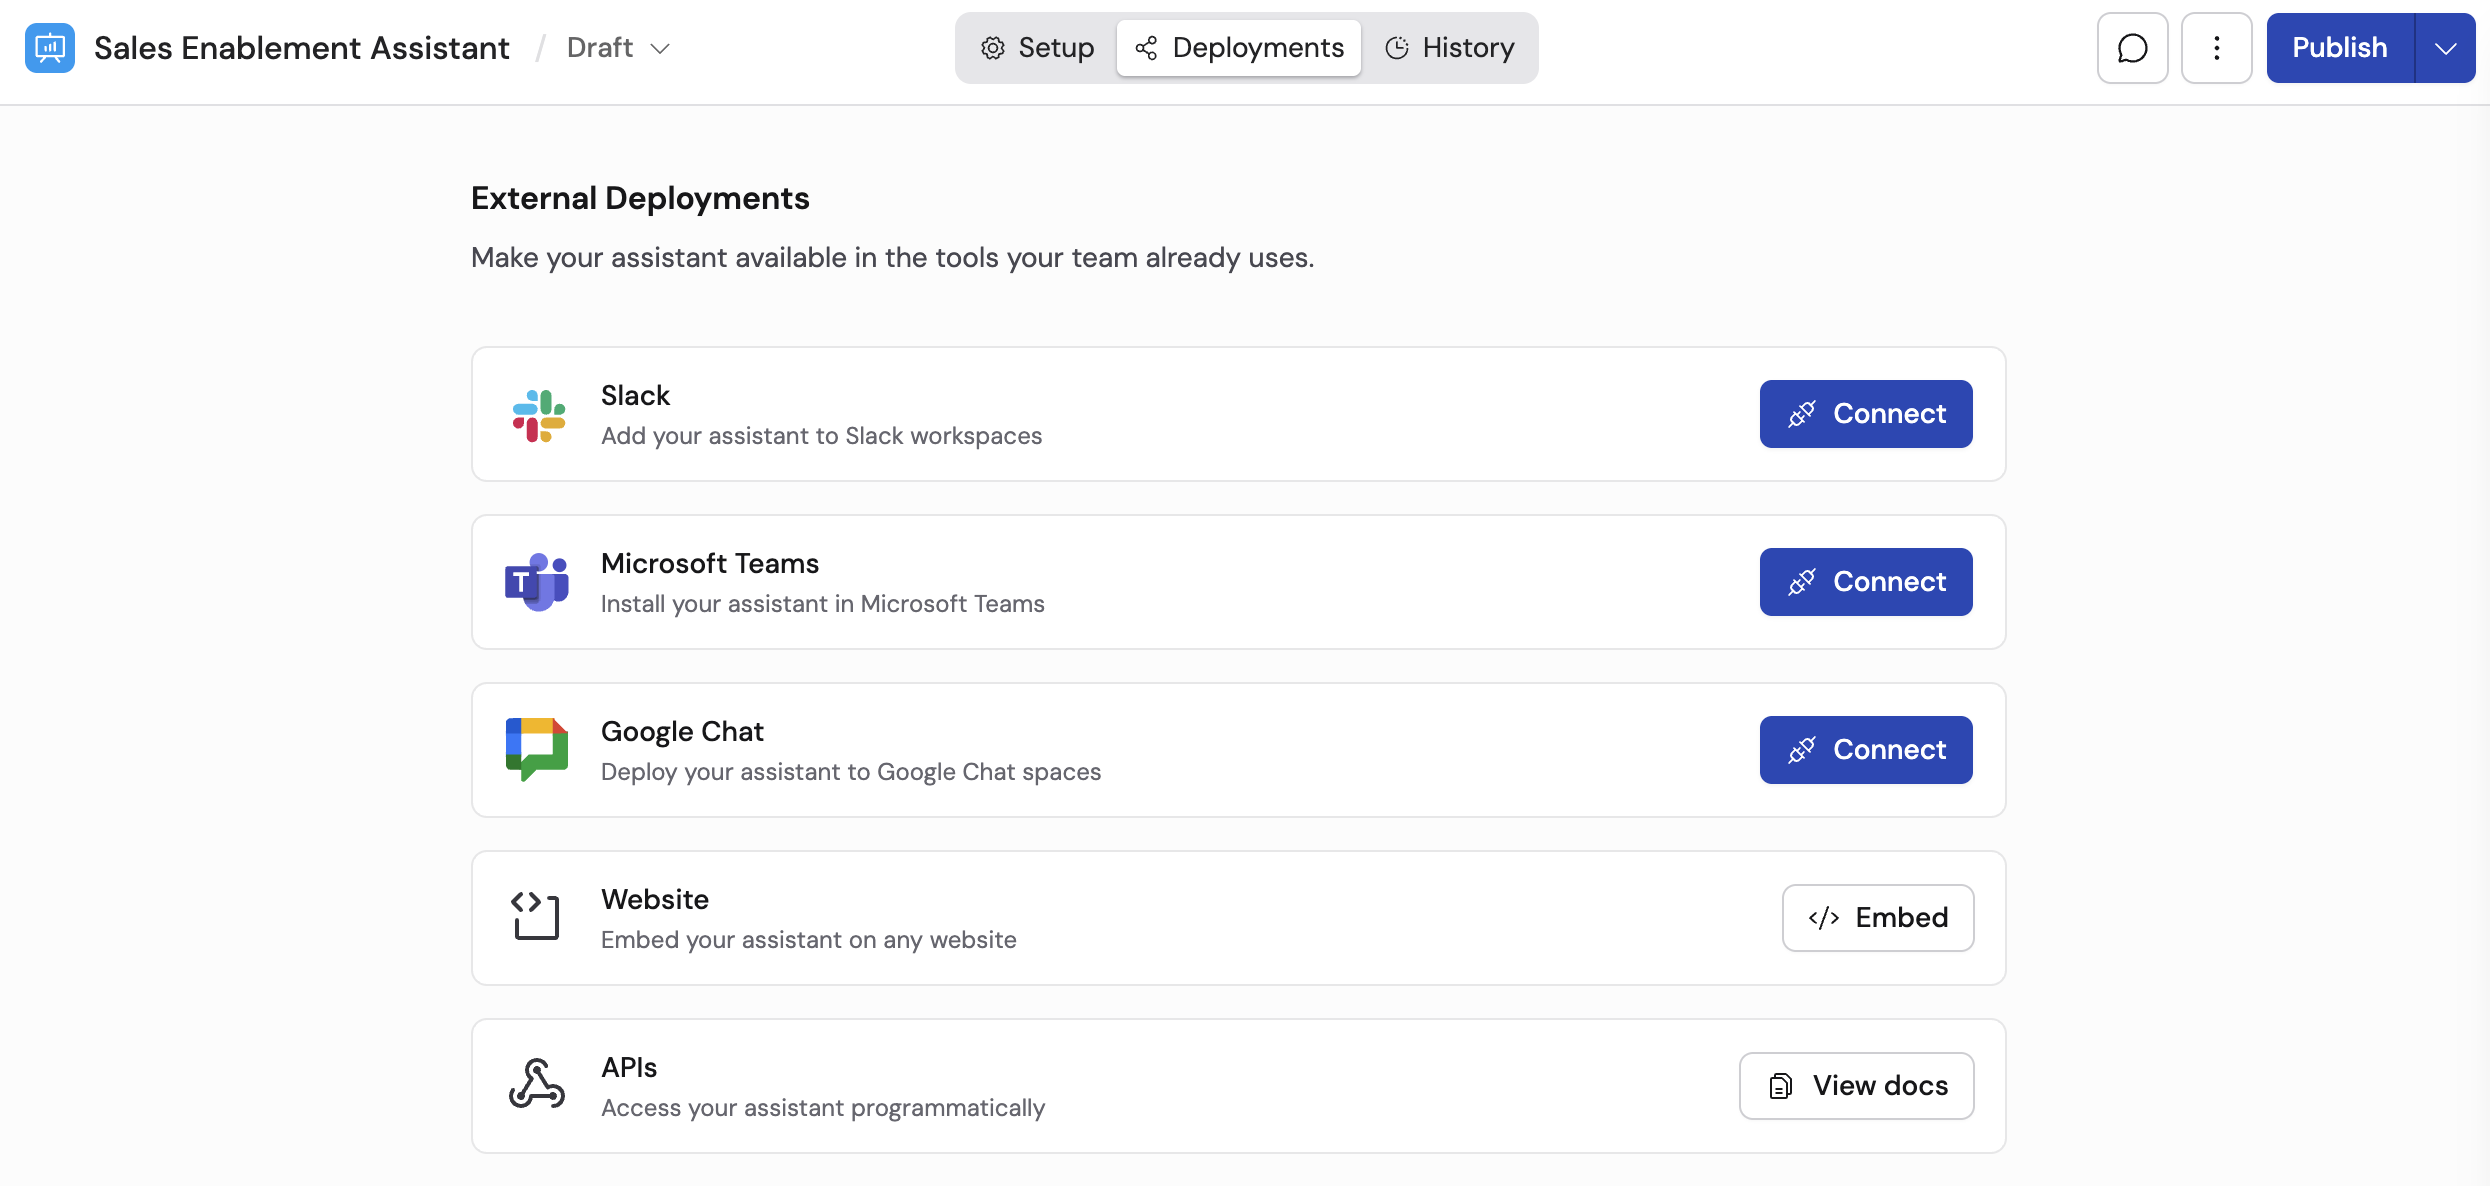
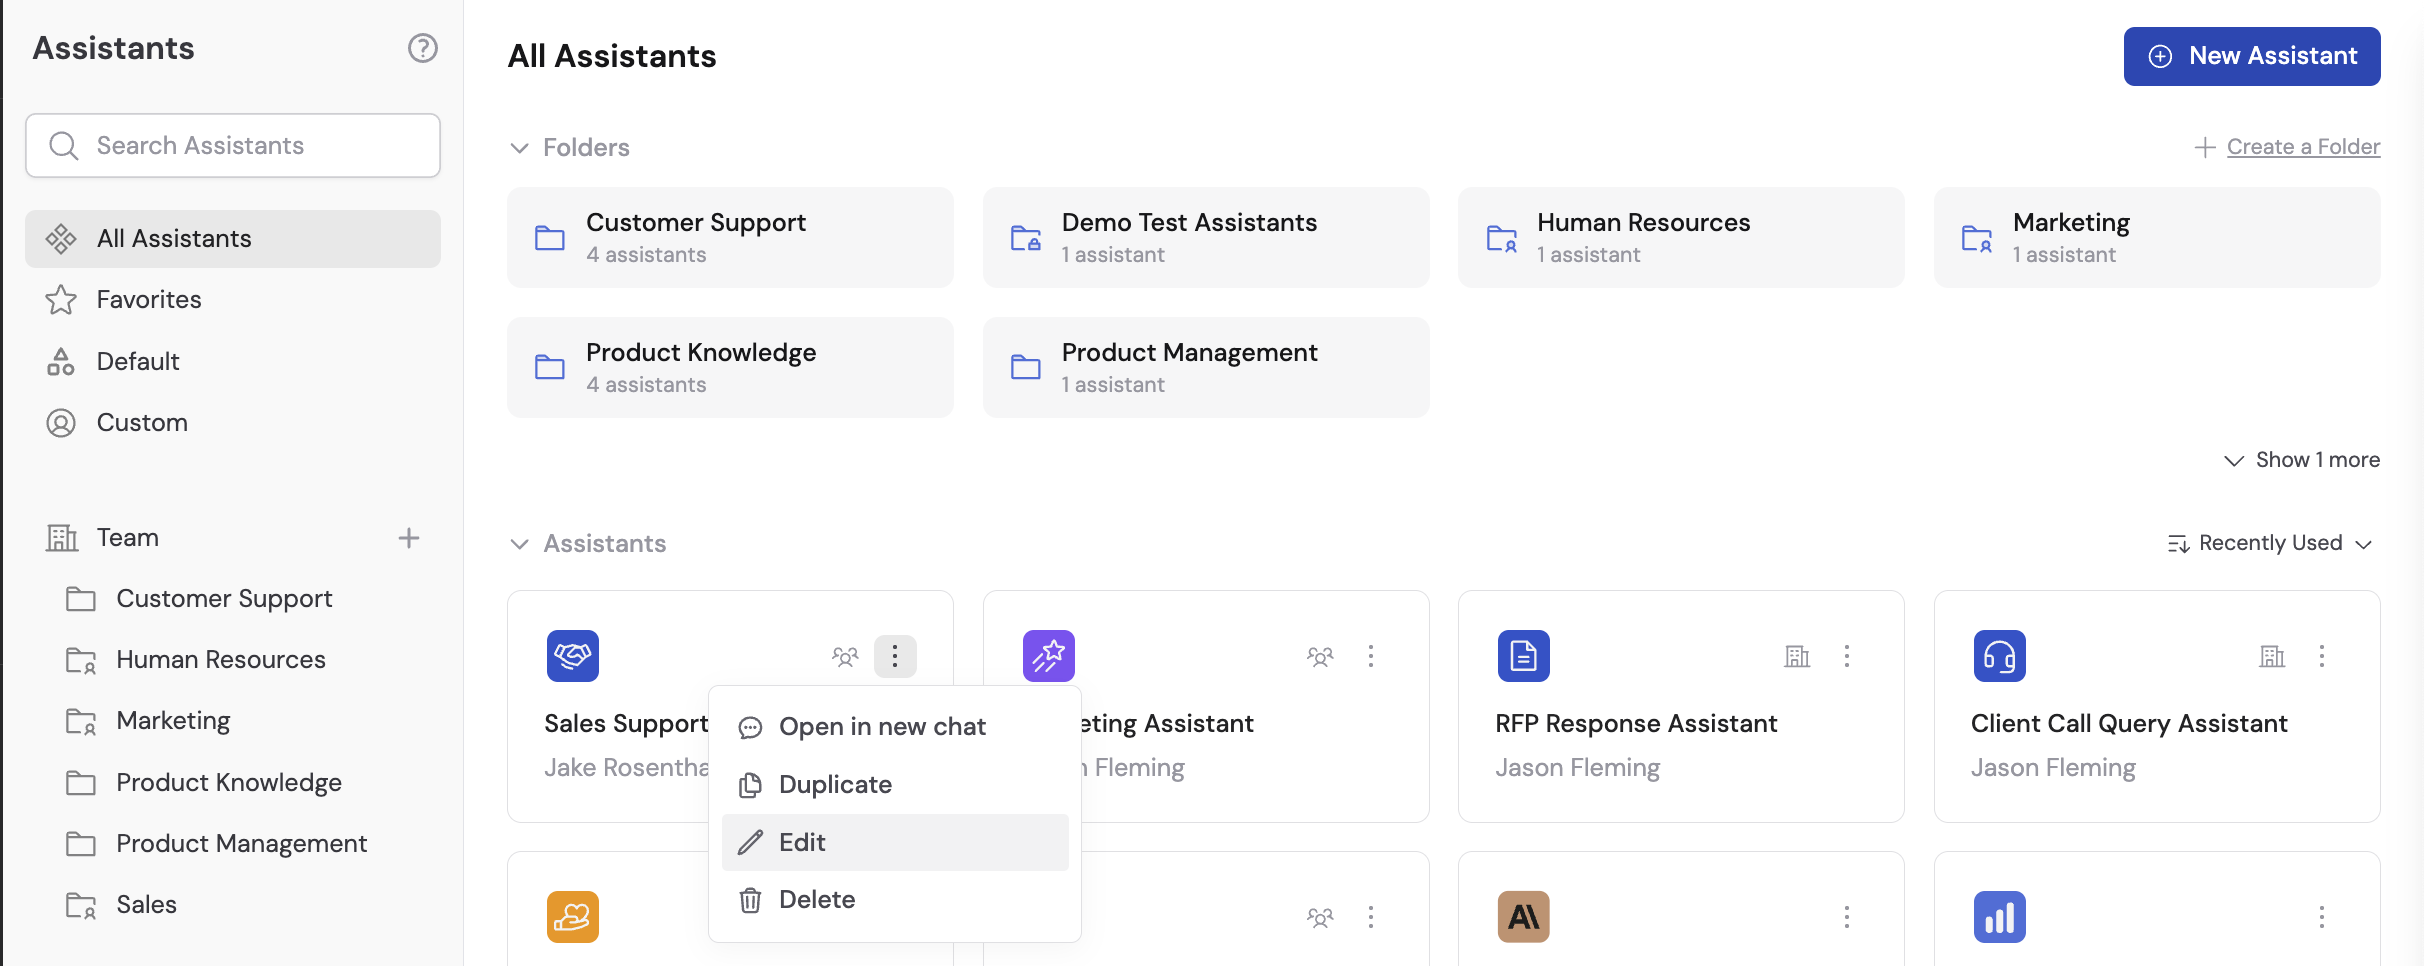 Navigate to the **Deployments** tab in your Agent's settings.
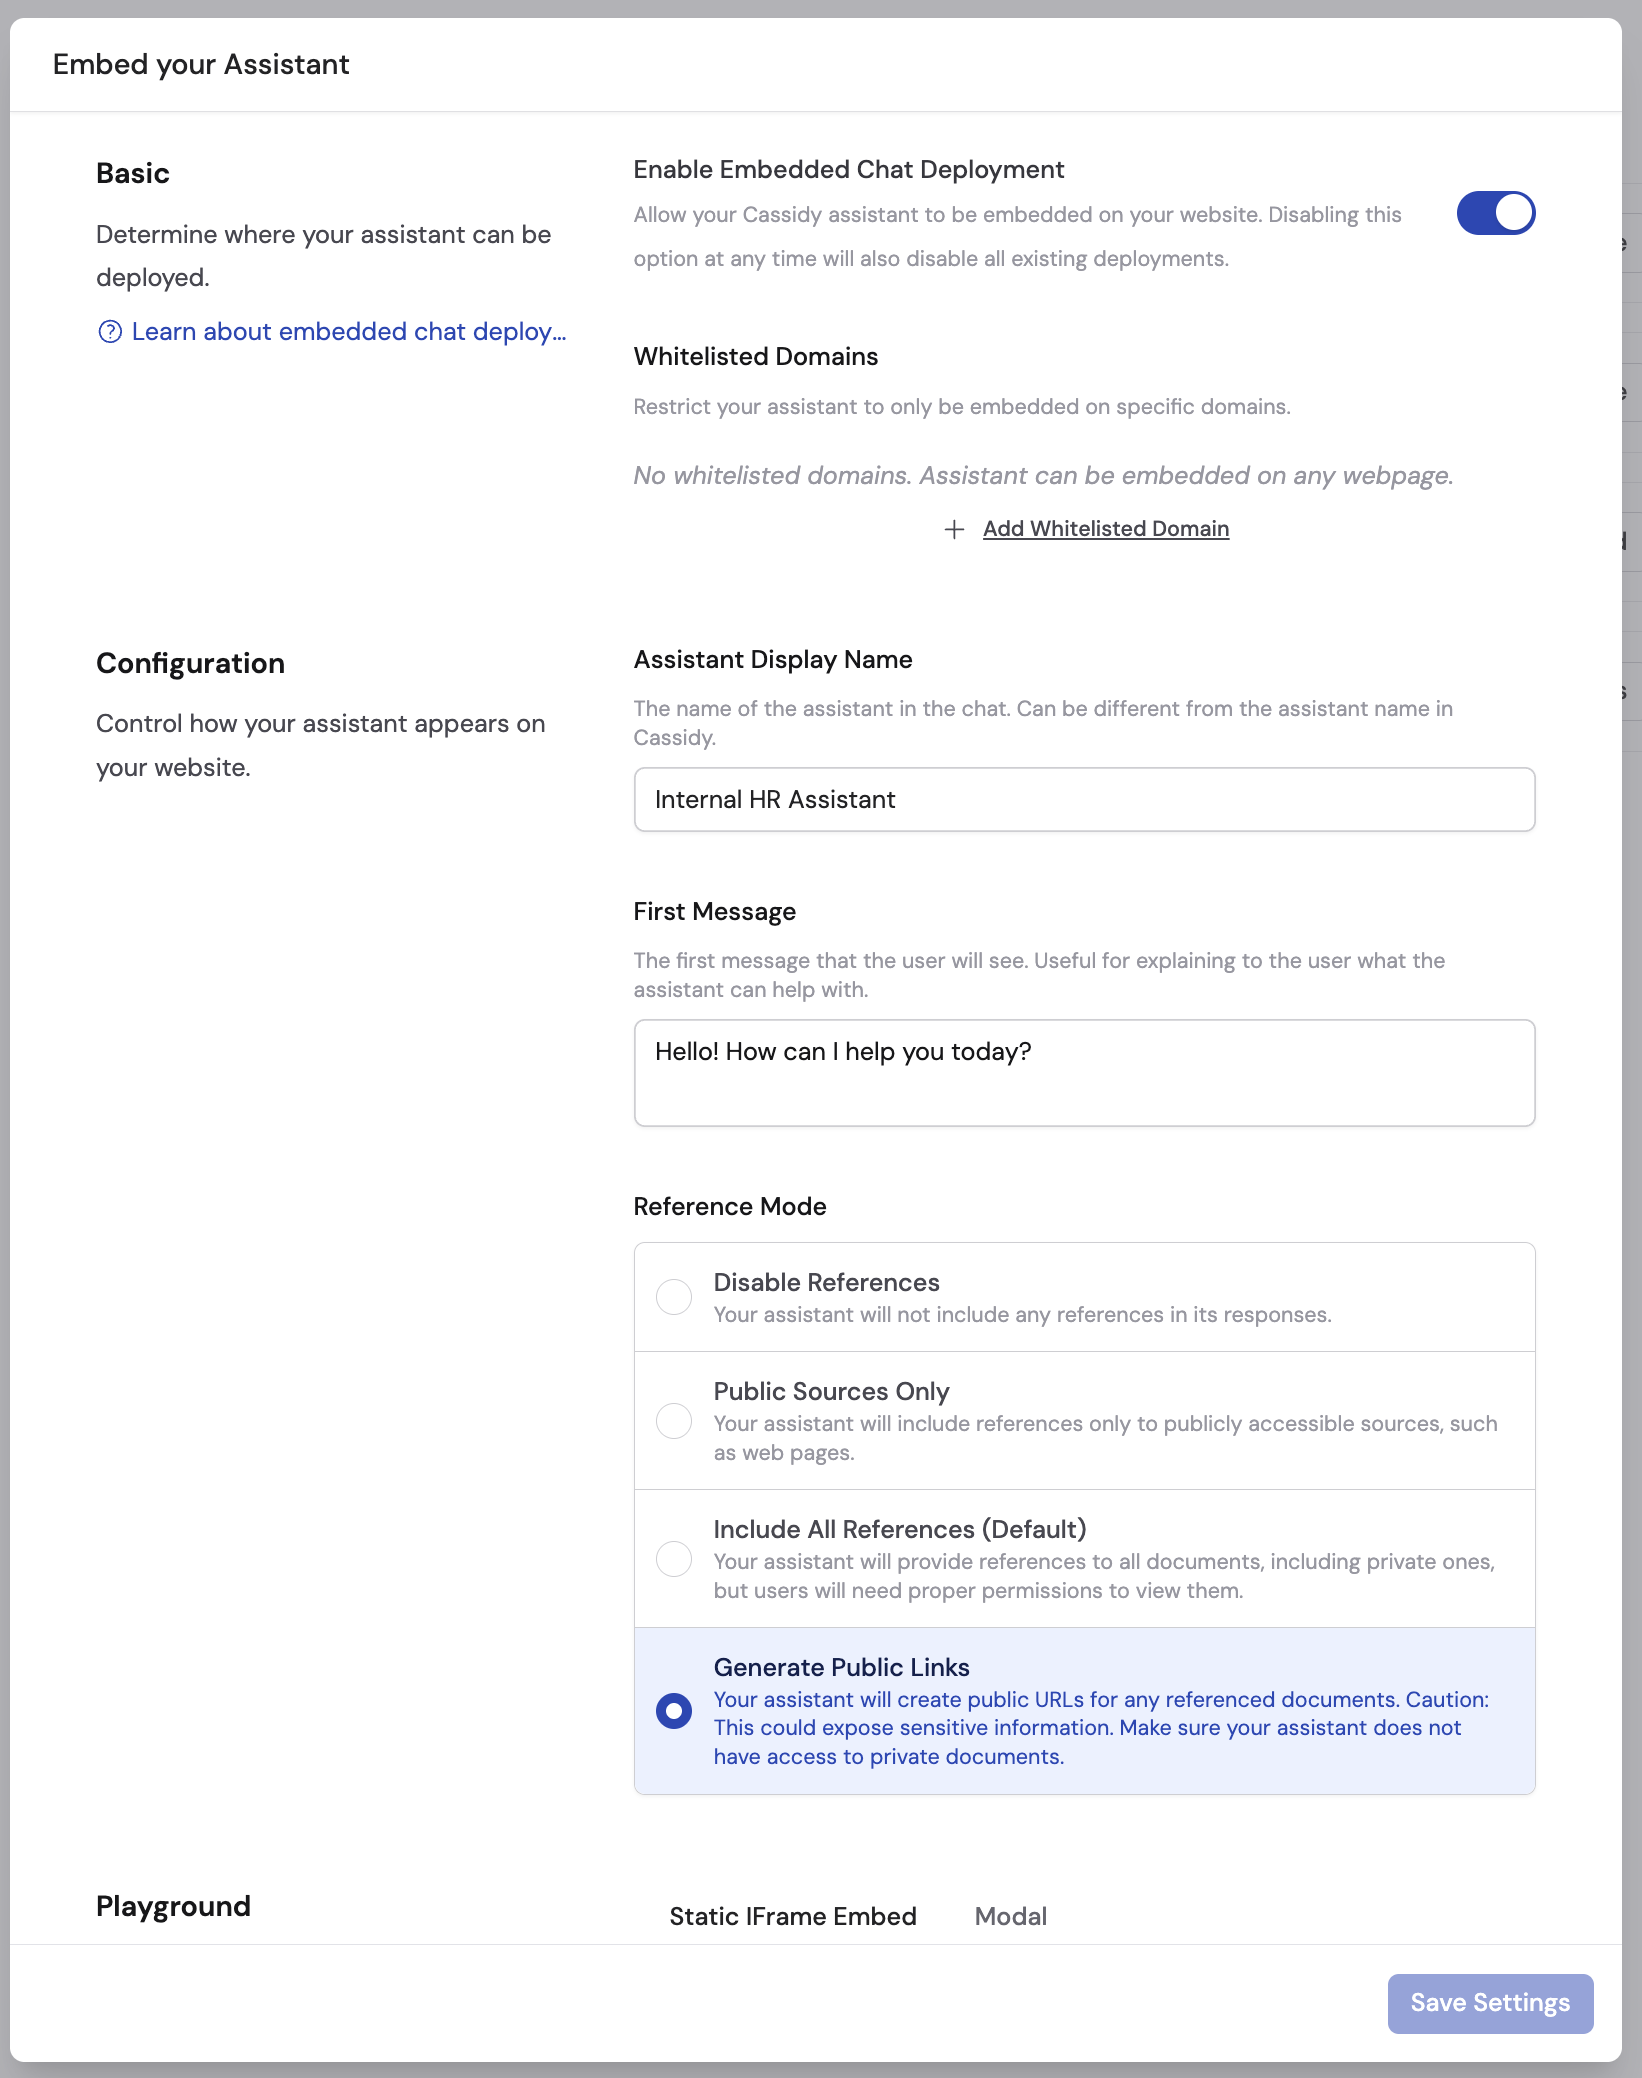 Toggle on **Enable Embedded Chat Deployment**.
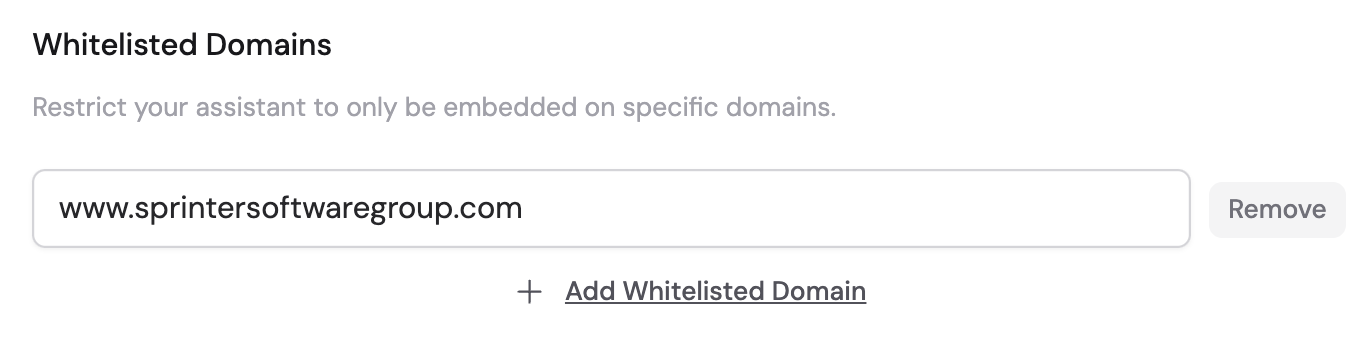
 Click **Add Whitelisted Domain** to specify which website domains are allowed to embed the Agent. You can add multiple domains and remove them as needed.
 By default, anyone who has the embed URL can chat with your Agent. To restrict access to only your authenticated users, toggle on **Require Secure Token**.
When enabled, the embed URL requires a short-lived authentication token to work. Create this token on your own backend with your Cassidy API key after you authenticate the user. See [Restrict access with secure tokens](#restrict-access-with-secure-tokens) below for setup instructions. If visitors see an **Unauthorized** error instead of the chat, see [Troubleshooting](#troubleshooting).
By default, anyone who has the embed URL can chat with your Agent. To restrict access to only your authenticated users, toggle on **Require Secure Token**.
When enabled, the embed URL requires a short-lived authentication token to work. Create this token on your own backend with your Cassidy API key after you authenticate the user. See [Restrict access with secure tokens](#restrict-access-with-secure-tokens) below for setup instructions. If visitors see an **Unauthorized** error instead of the chat, see [Troubleshooting](#troubleshooting).
 Enter the **Agent Display Name** that visitors will see in the embedded chat widget.
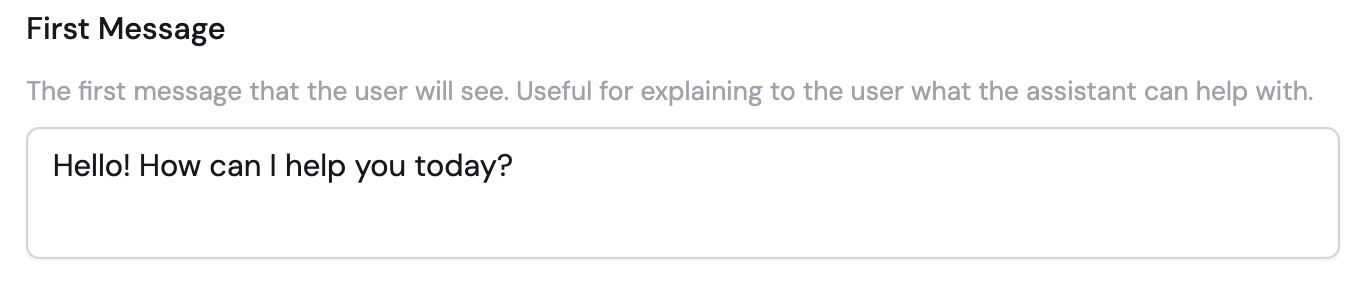
 Enter the **First Message** that greets visitors when they open the chat. Use this to welcome users or prompt them to ask a question.
 Select the appropriate **Reference Mode** for your use case:
* **Disable References** — no citations shown in responses
* **Public Sources Only** — only links to publicly accessible sources
* **Include All References** (default) — all citations shown, but users need permissions to view private documents
* **Generate Public Links** — creates public URLs for cited documents
Select the appropriate **Reference Mode** for your use case:
* **Disable References** — no citations shown in responses
* **Public Sources Only** — only links to publicly accessible sources
* **Include All References** (default) — all citations shown, but users need permissions to view private documents
* **Generate Public Links** — creates public URLs for cited documents
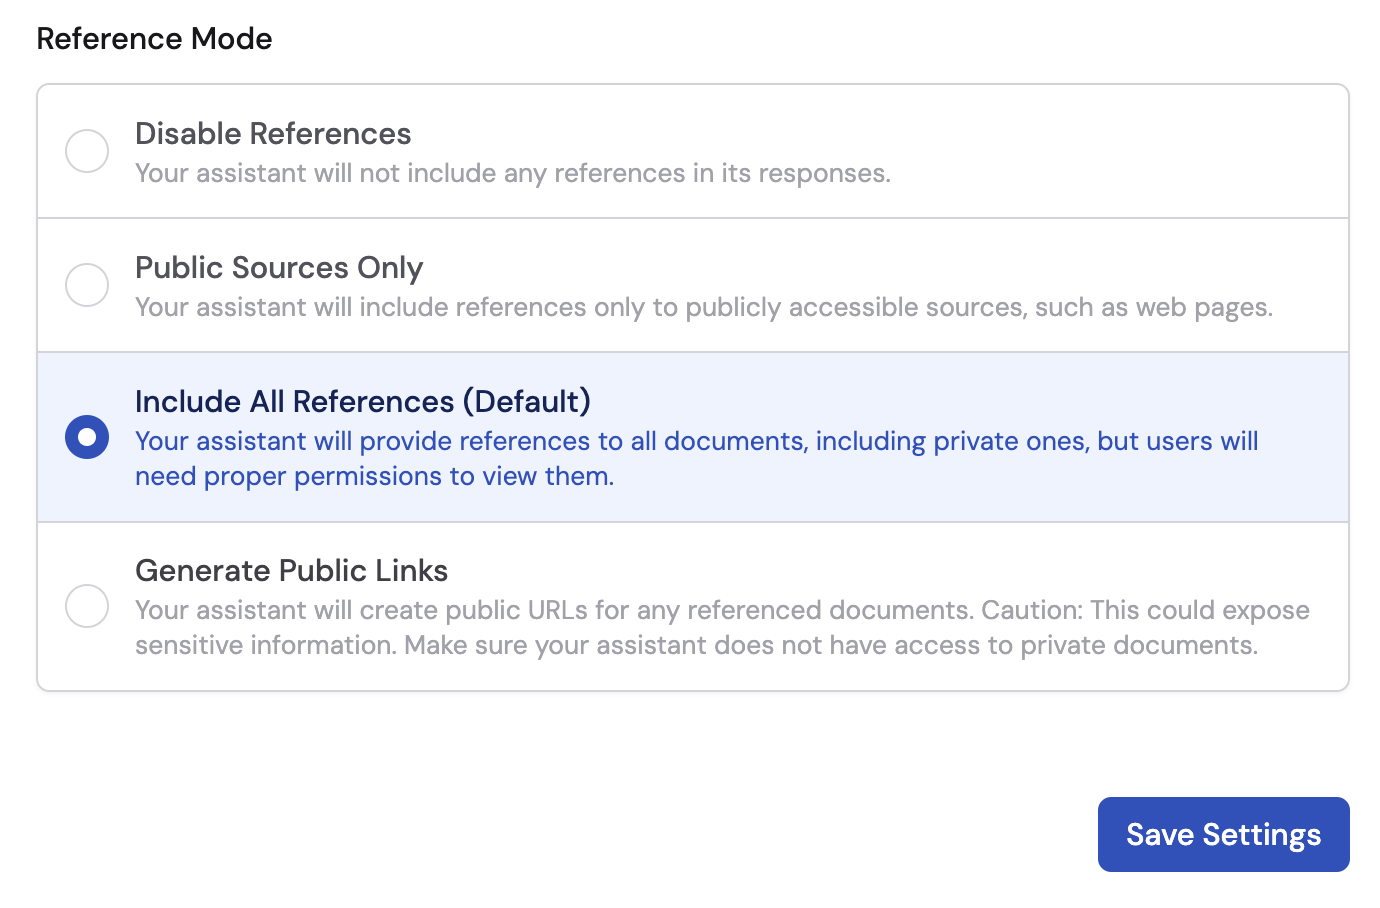 **Generate Public Links** can expose sensitive information. Only use this option if your Agent does not have access to private documents.
Click **Save Settings** to apply your configuration.
In the **Embed Code** section, choose between two formats:
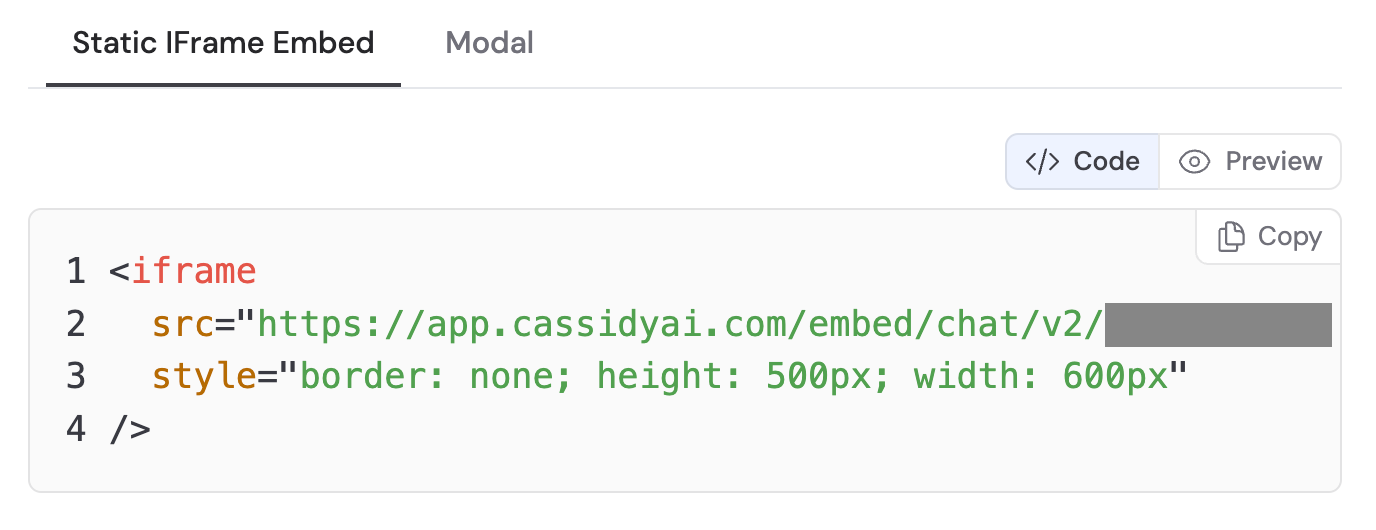
* **Static IFrame** — the chat component is always visible on the page, ideal for support pages or help centers
**Generate Public Links** can expose sensitive information. Only use this option if your Agent does not have access to private documents.
Click **Save Settings** to apply your configuration.
In the **Embed Code** section, choose between two formats:
* **Static IFrame** — the chat component is always visible on the page, ideal for support pages or help centers
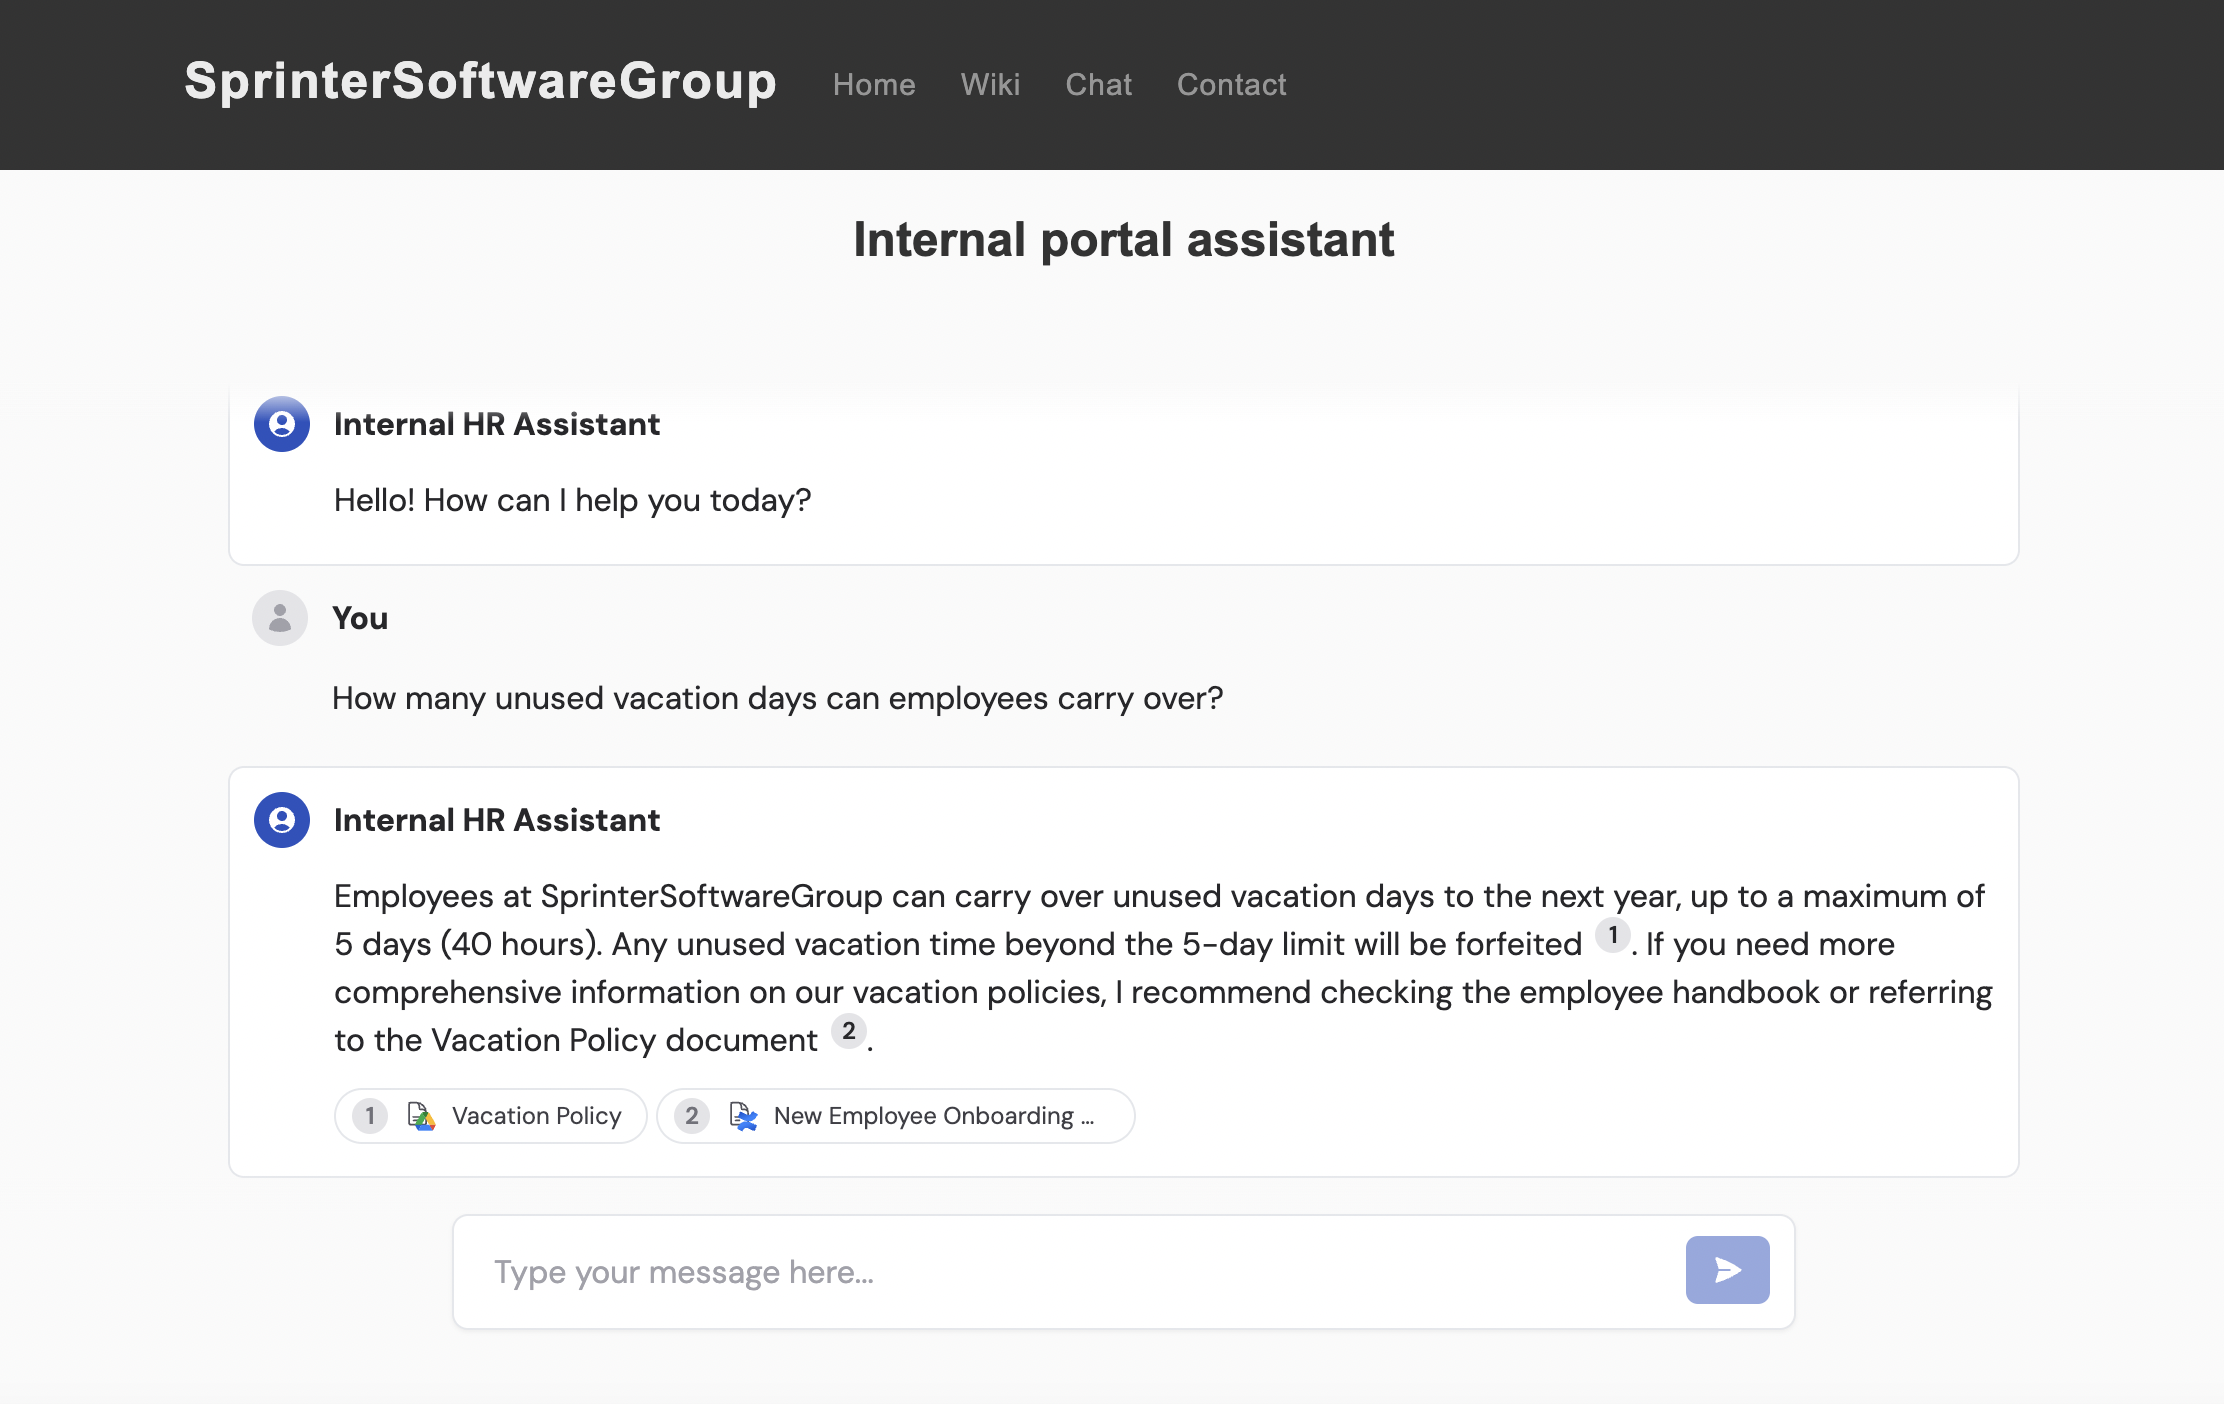 * **Modal** — a floating button that opens the chat as an overlay, best when you want to offer help without taking up permanent space
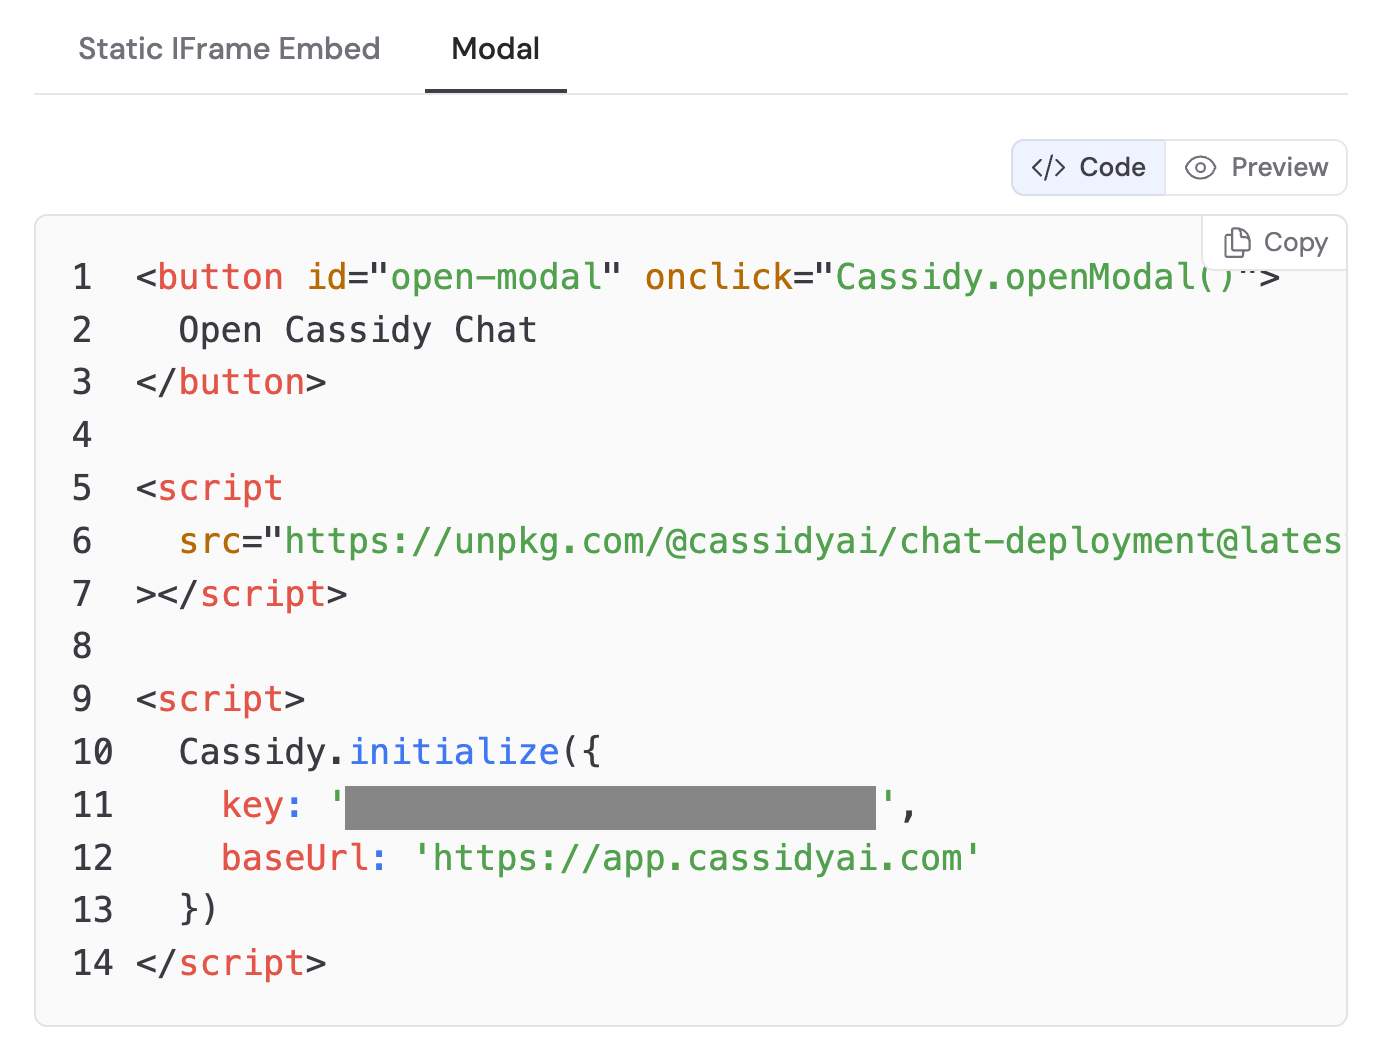
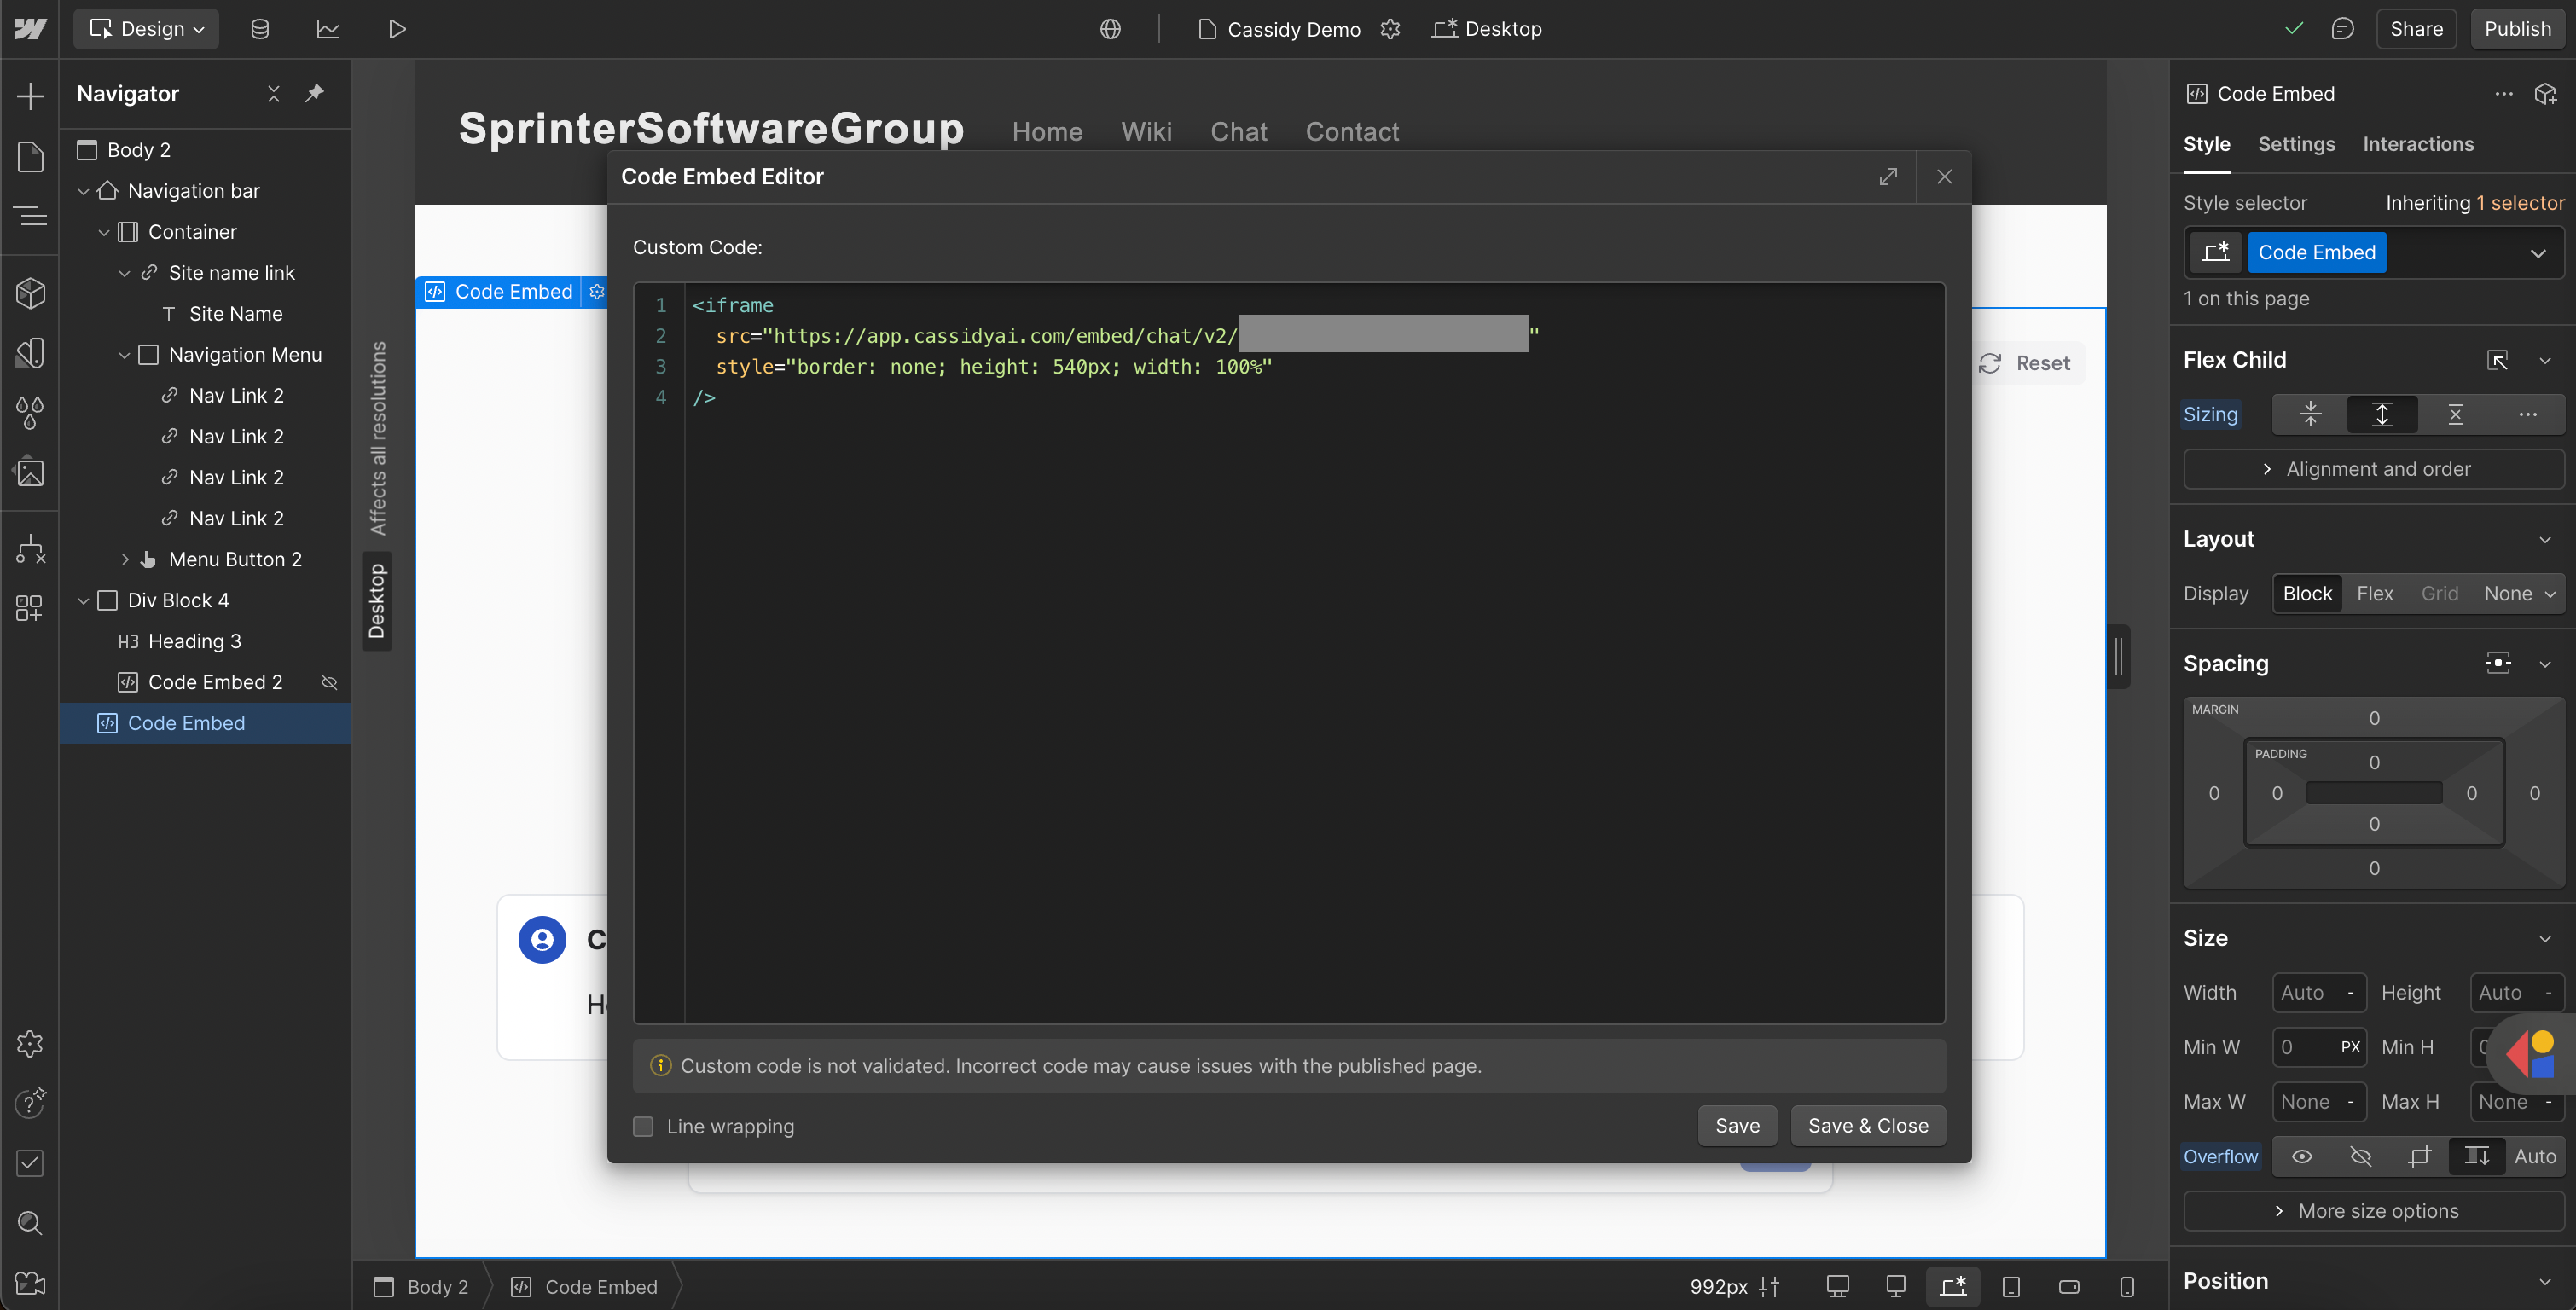
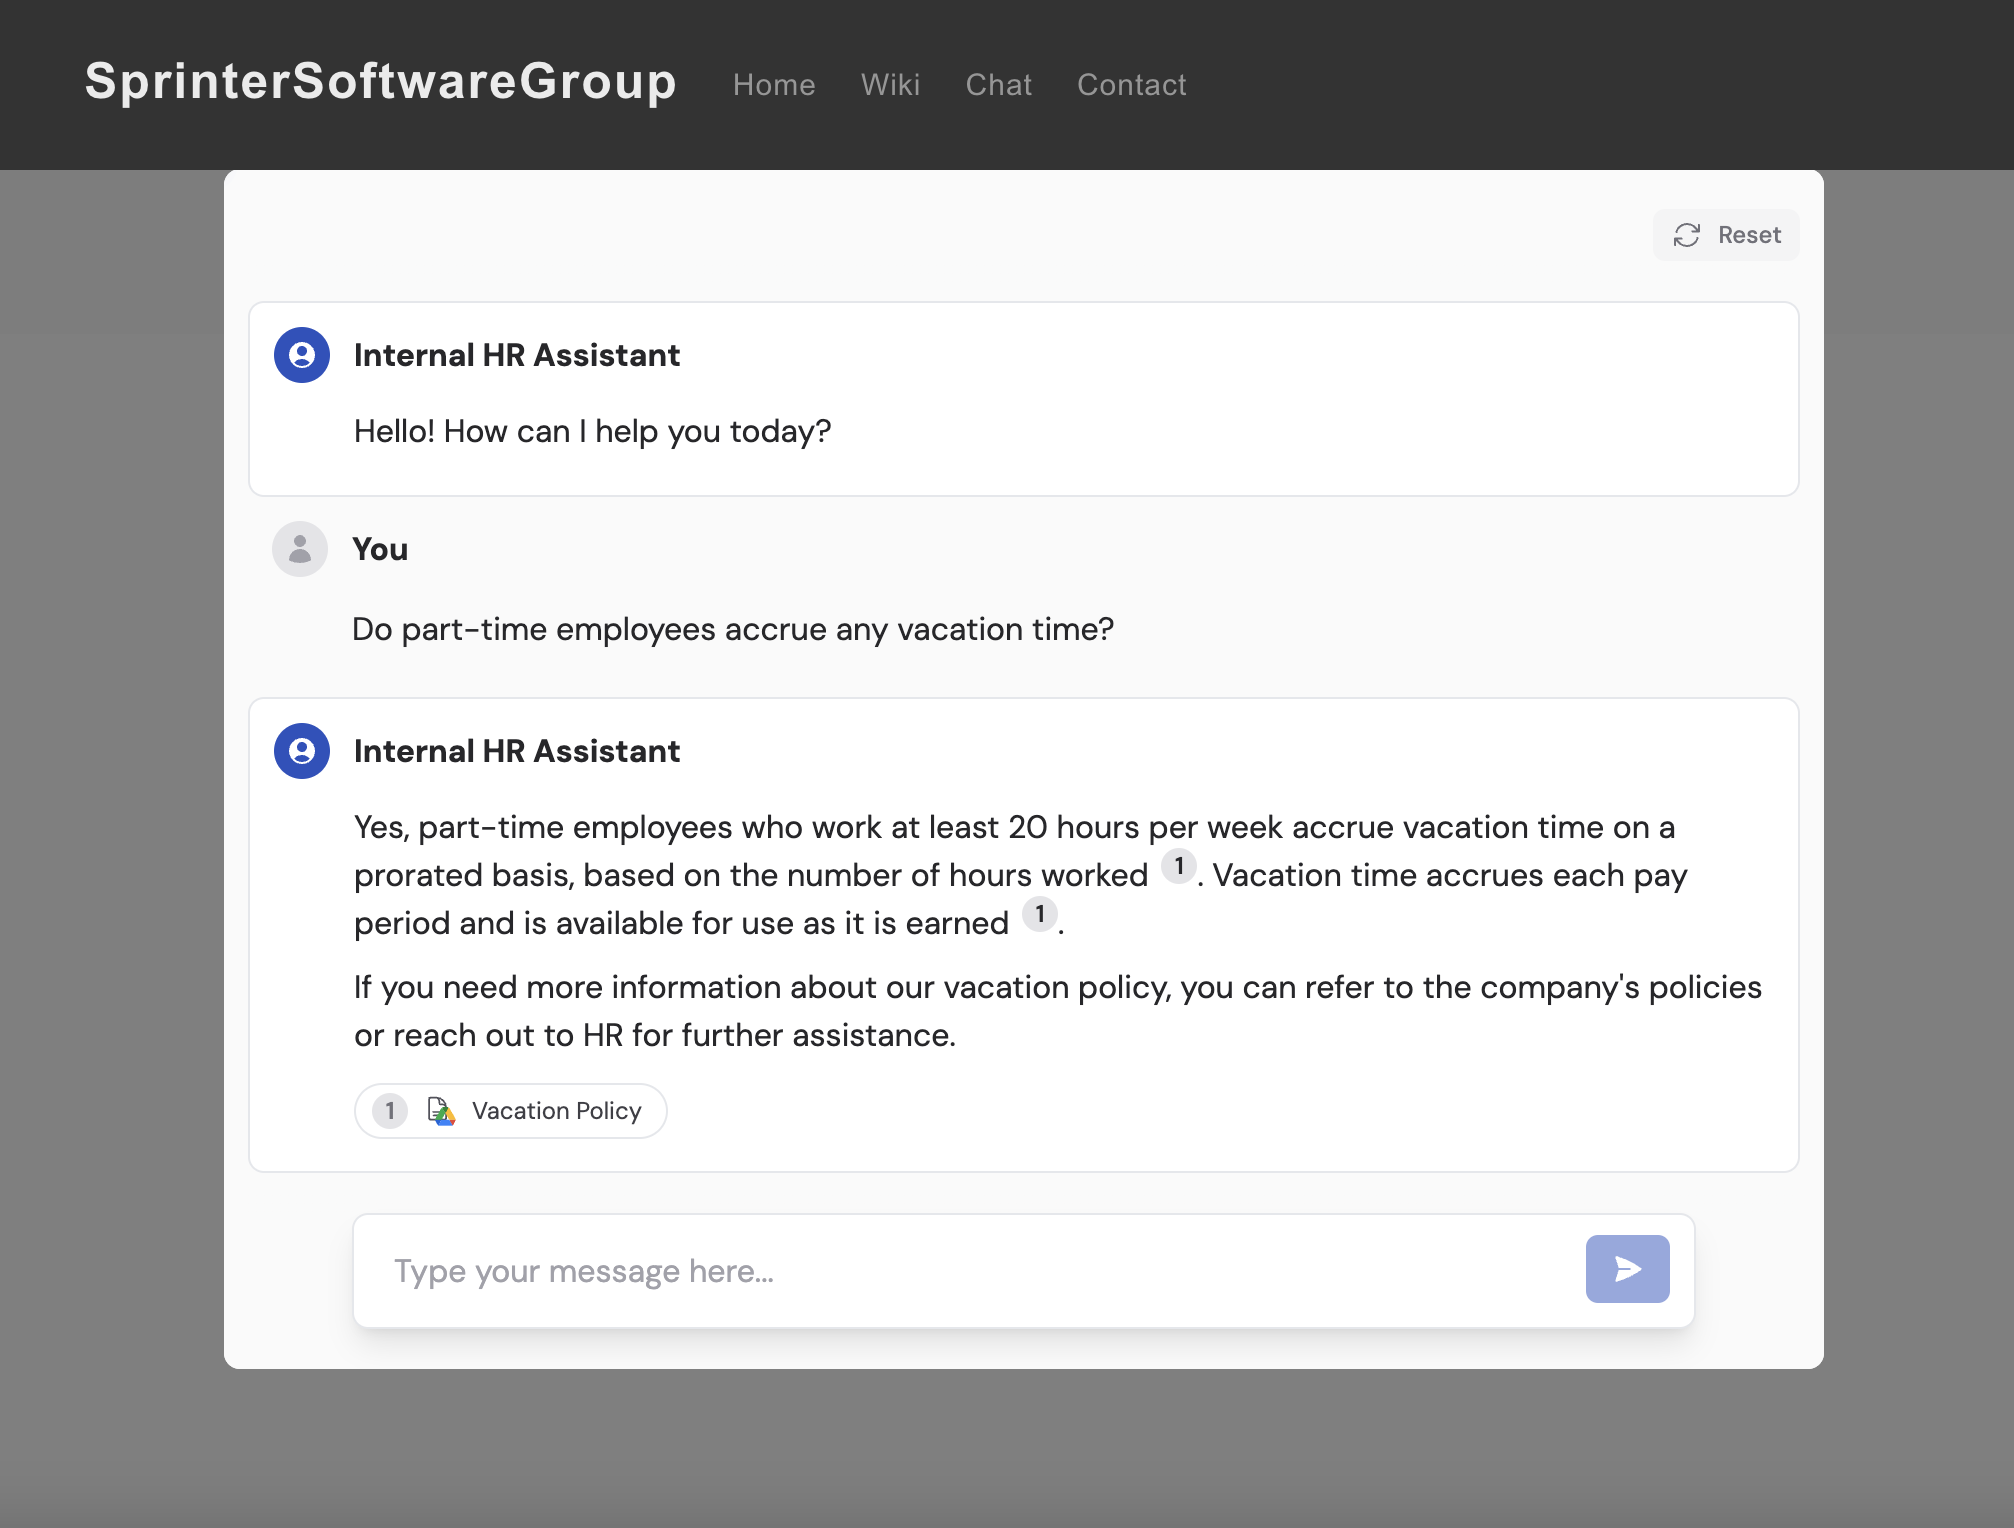 Copy the embed code and paste it into your website's HTML where you want the chat to appear. If you're using a website builder, add it to a custom HTML block.
 Test the embed on a staging environment before deploying to production. Click
**Preview** in Cassidy to see what the embedded chat looks like before
publishing.
## Regenerate your embed URL or modal
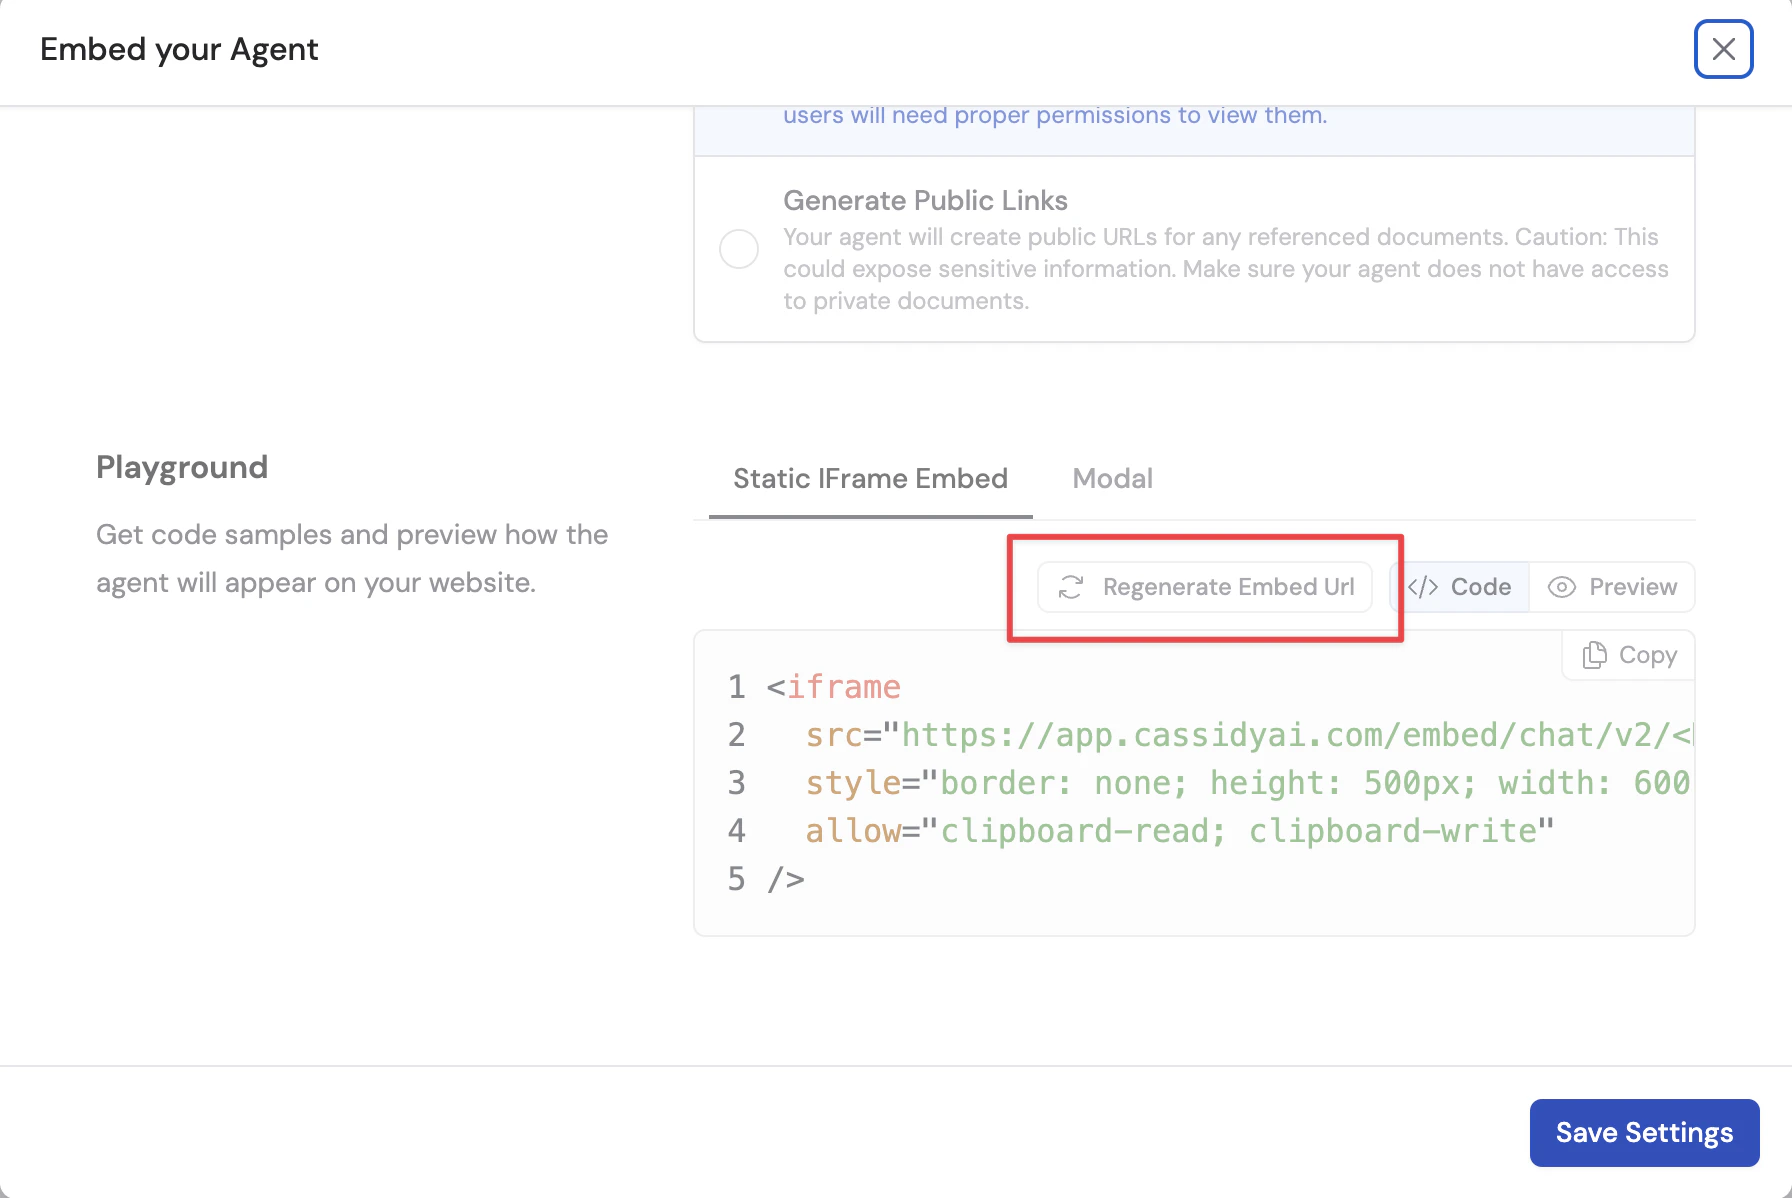
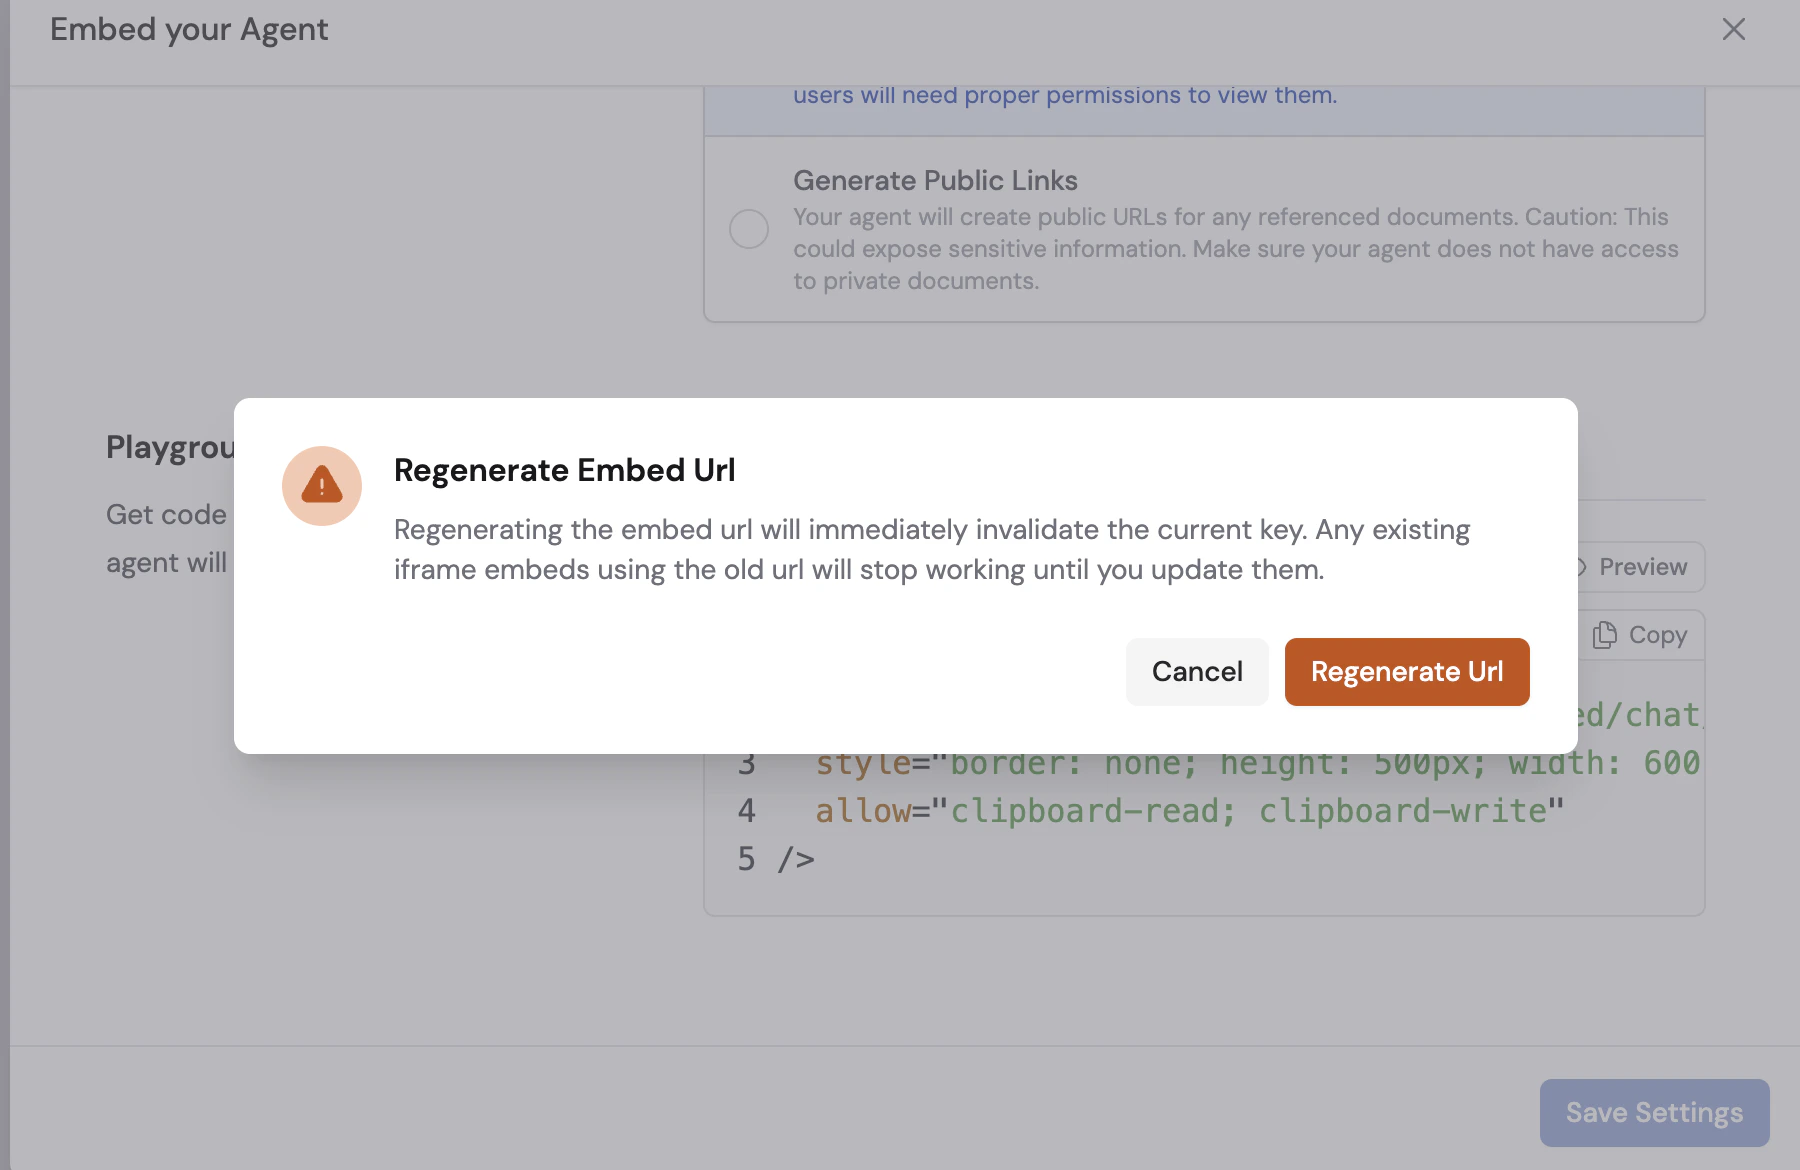
If you need to regenerate the current embed credentials (for example, when you suspect they may have been exposed), click the **Regenerate Embed Url/Key** button. This will create a new embed key or URL and immediately invalidate all existing chats using the old one.
Test the embed on a staging environment before deploying to production. Click
**Preview** in Cassidy to see what the embedded chat looks like before
publishing.
## Regenerate your embed URL or modal
If you need to regenerate the current embed credentials (for example, when you suspect they may have been exposed), click the **Regenerate Embed Url/Key** button. This will create a new embed key or URL and immediately invalidate all existing chats using the old one.
 ## Restrict access with secure tokens
By default, an embedded Agent is public. Anyone with the embed URL can chat with it. Whitelisted domains only control which sites may visually embed the iframe in a browser; they do not stop someone who has the URL from opening it directly. To allow only your authenticated users to chat, enable **Require Secure Token**.
With secure tokens enabled, every embedded chat request must include a short-lived token. Your backend mints that token using your Cassidy API key.
Never put your Cassidy API key in frontend code. Mint tokens only from your
backend, then pass the resulting token to the frontend page.
Use your own login system to confirm the visitor is allowed to use the Agent.
From your backend, call the [embed token endpoint](https://app.cassidyai.com/api-docs) with your Cassidy API key. The token defaults to a 1-hour lifetime, with a 7-day maximum.
```js theme={null}
const response = await fetch("https://app.cassidyai.com/api/assistants/embed/token/create", {
method: "POST",
headers: {
"x-api-key": "{YOUR_API_KEY}",
"Content-Type": "application/json"
},
body: JSON.stringify({
deployment_key: "YOUR_DEPLOYMENT_KEY",
expires_in_seconds: 3600
})
})
const { token, expires_at } = await response.json()
```
Return the token to your frontend.
* **Static iframe** — append the token to the embed URL as a fragment (`#token=...`). The embed reads the token from the URL when it loads. Your app is responsible for refreshing tokens before they expire — mint a new token from your backend and update the iframe `src` with the new fragment.
```html theme={null}
```
* **Modal** — fetch a token from your backend after authenticating the user, then pass it to `Cassidy.initialize` as `authToken`. Your app is responsible for refreshing tokens before they expire.
```html theme={null}
```
### Troubleshooting
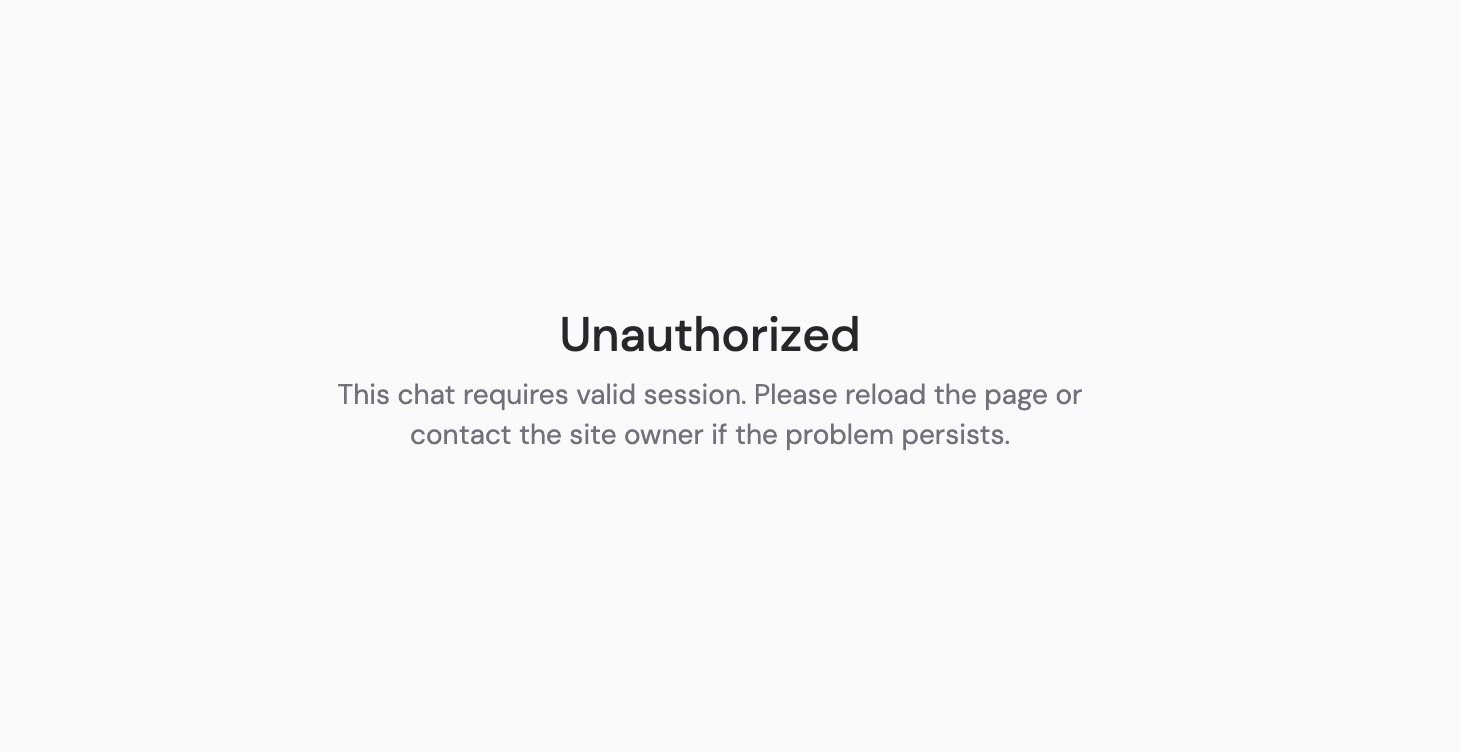
If **Require Secure Token** is enabled and the embed does not receive a valid token, visitors will see an **Unauthorized** screen instead of the chat. This means the embed is working, but the token was missing, expired, or not passed correctly.
## Restrict access with secure tokens
By default, an embedded Agent is public. Anyone with the embed URL can chat with it. Whitelisted domains only control which sites may visually embed the iframe in a browser; they do not stop someone who has the URL from opening it directly. To allow only your authenticated users to chat, enable **Require Secure Token**.
With secure tokens enabled, every embedded chat request must include a short-lived token. Your backend mints that token using your Cassidy API key.
Never put your Cassidy API key in frontend code. Mint tokens only from your
backend, then pass the resulting token to the frontend page.
Use your own login system to confirm the visitor is allowed to use the Agent.
From your backend, call the [embed token endpoint](https://app.cassidyai.com/api-docs) with your Cassidy API key. The token defaults to a 1-hour lifetime, with a 7-day maximum.
```js theme={null}
const response = await fetch("https://app.cassidyai.com/api/assistants/embed/token/create", {
method: "POST",
headers: {
"x-api-key": "{YOUR_API_KEY}",
"Content-Type": "application/json"
},
body: JSON.stringify({
deployment_key: "YOUR_DEPLOYMENT_KEY",
expires_in_seconds: 3600
})
})
const { token, expires_at } = await response.json()
```
Return the token to your frontend.
* **Static iframe** — append the token to the embed URL as a fragment (`#token=...`). The embed reads the token from the URL when it loads. Your app is responsible for refreshing tokens before they expire — mint a new token from your backend and update the iframe `src` with the new fragment.
```html theme={null}
```
* **Modal** — fetch a token from your backend after authenticating the user, then pass it to `Cassidy.initialize` as `authToken`. Your app is responsible for refreshing tokens before they expire.
```html theme={null}
```
### Troubleshooting
If **Require Secure Token** is enabled and the embed does not receive a valid token, visitors will see an **Unauthorized** screen instead of the chat. This means the embed is working, but the token was missing, expired, or not passed correctly.
 Common causes:
* The embed code on your website does not include a token (for example, the iframe URL is missing `#token=...`, or the modal was initialized without `authToken`).
* The token expired and your site has not refreshed it yet.
* Your backend is not minting tokens correctly, or the token was created for a different deployment key.
What to do:
* If you copied embed code from Cassidy before setting up secure tokens, update your website with the latest embed instructions above.
* Ask whoever manages your website to confirm tokens are being created on your backend and passed into the embed.
* Try reloading the page. If the error persists, contact your site administrator or Cassidy support.
## Next steps
Learn more about creating and configuring Agents.
Deploy your Agent to a dedicated email address.
Build a custom integration using the Cassidy API.
Common causes:
* The embed code on your website does not include a token (for example, the iframe URL is missing `#token=...`, or the modal was initialized without `authToken`).
* The token expired and your site has not refreshed it yet.
* Your backend is not minting tokens correctly, or the token was created for a different deployment key.
What to do:
* If you copied embed code from Cassidy before setting up secure tokens, update your website with the latest embed instructions above.
* Ask whoever manages your website to confirm tokens are being created on your backend and passed into the embed.
* Try reloading the page. If the error persists, contact your site administrator or Cassidy support.
## Next steps
Learn more about creating and configuring Agents.
Deploy your Agent to a dedicated email address.
Build a custom integration using the Cassidy API.